Installing a netting system in a 320W grow tent can significantly enhance your plant cultivation experience. As a 320W Grow Tent supplier, I've witnessed firsthand the benefits of a well - installed netting system. In this blog, I'll guide you through the process step by step.
Why Install a Netting System?
Before we dive into the installation process, let's understand why a netting system is essential for your 320W grow tent. A netting system provides support for your plants as they grow. It helps to keep the branches upright, preventing them from bending or breaking under the weight of the fruits or flowers. This support also allows for better air circulation around the plants, reducing the risk of mold and mildew. Additionally, a netting system can help you train your plants, guiding them to grow in a more organized manner and maximizing the use of space within the grow tent.
Tools and Materials Needed
To install a netting system in your 320W grow tent, you'll need the following tools and materials:
- Netting: Choose a high - quality netting that is strong enough to support the weight of your plants. The mesh size should be appropriate for the type of plants you are growing.
- Adjustable Rope Ratchet Light Hanger [/grow - accessories/light - hanger/adjustable - rope - ratchet - light - hanger.html]: These hangers will be used to suspend the netting from the top of the grow tent. They allow you to adjust the height of the netting easily.
- Scissors: You'll need scissors to cut the netting to the appropriate size.
- Measuring tape: To ensure that the netting fits properly in the grow tent, you'll need a measuring tape to measure the dimensions of the tent.
Step 1: Measure the Grow Tent
The first step is to measure the dimensions of your 320W grow tent. Measure the length, width, and height of the tent. Make sure to measure accurately, as this will determine the size of the netting you need. Write down these measurements so that you can refer to them later.
Step 2: Cut the Netting
Using the measurements you took in the previous step, cut the netting to the appropriate size. Make sure to leave a little extra netting around the edges to allow for easy installation. Use sharp scissors to make clean cuts.


Step 3: Install the Adjustable Rope Ratchet Light Hangers
Attach the Adjustable Rope Ratchet Light Hangers to the top of the grow tent. These hangers should be evenly spaced along the length and width of the tent. Make sure they are securely attached to the tent frame. You can use the adjustable feature of the hangers to set the initial height of the netting.
Step 4: Hang the Netting
Once the hangers are installed, it's time to hang the netting. Start by attaching one corner of the netting to a hanger. Then, stretch the netting across the tent and attach the other corners to the remaining hangers. Make sure the netting is taut but not overly stretched. You can use the adjustable feature of the hangers to fine - tune the height and tension of the netting.
Step 5: Secure the Netting
To ensure that the netting stays in place, you can use additional ties or clips to secure it to the hangers. This will prevent the netting from shifting or sagging over time.
Additional Considerations
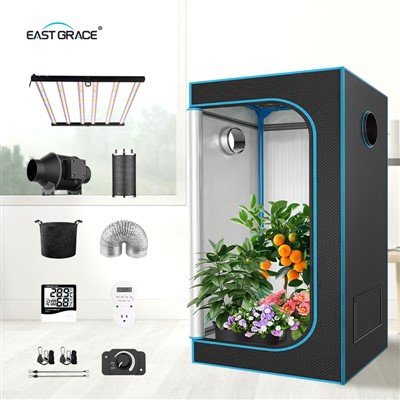
- Ventilation: Proper ventilation is crucial in a grow tent. Along with the netting system, you may want to consider installing an Inline Duct Fan [/grow - accessories/inline - duct - fan/inline - duct - fans.html] to improve air circulation. This fan will help to remove stale air and bring in fresh air, creating a healthy environment for your plants.
- Ducting: To connect the inline duct fan to the grow tent, you'll need a Sliver Air Flex Duct [/grow - accessories/sliver - air - flex - duct/sliver - air - flex - ducts.html]. This duct will ensure that the air is properly channeled in and out of the tent.
Maintenance of the Netting System
Once the netting system is installed, it's important to maintain it properly. Regularly check the netting for any signs of wear or damage. If you notice any holes or tears, repair them immediately to prevent the netting from losing its support function. Also, make sure to clean the netting periodically to remove any dust or debris that may accumulate on it.
Conclusion
Installing a netting system in your 320W grow tent is a relatively simple process that can have a significant impact on the health and productivity of your plants. By following the steps outlined in this blog, you can create a well - organized and supportive environment for your plants.
If you're interested in purchasing a 320W grow tent or any of the accessories mentioned in this blog, feel free to reach out to us. We're here to help you with all your plant cultivation needs. Whether you're a beginner or an experienced grower, we have the products and expertise to support you.
References
- Gardening and Horticulture Handbook, 3rd Edition
- Grow Tent Installation Guide, Manufacturer's Manual